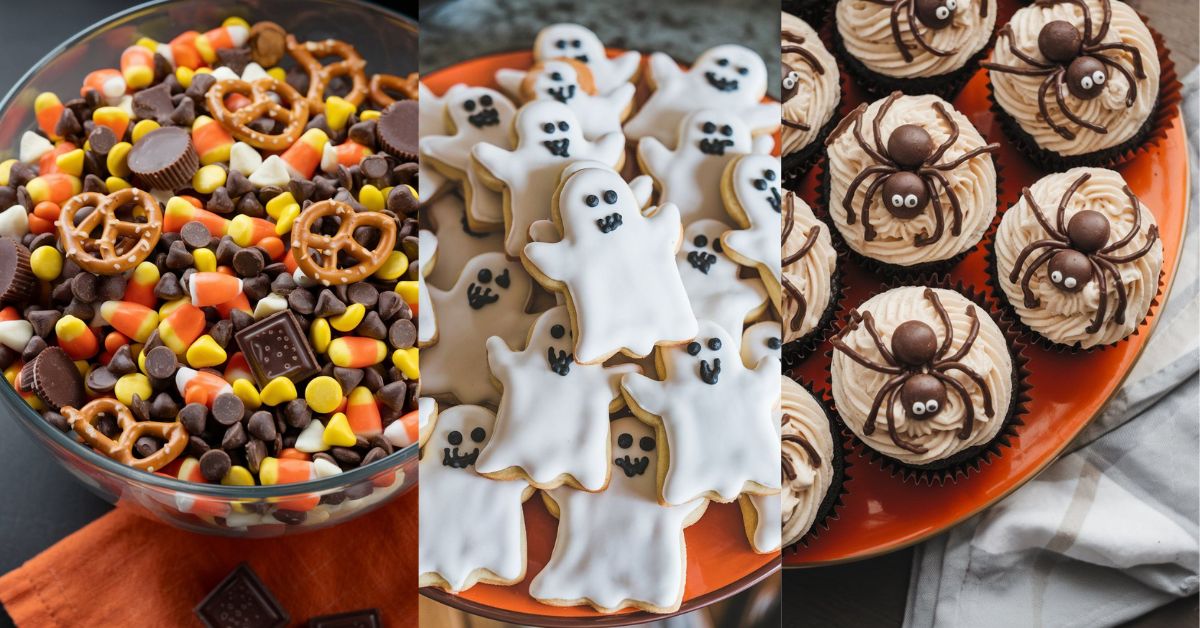
13 Halloween Treats: Spooky & Sweet Recipes for All Ages!
Halloween is coming, and it’s time to get creative in the kitchen. We have spooky recipes that everyone will love. These treats mix sweet flavors with festive fun, perfect for a fun cooking adventure.
Get ready for 13 delicious Halloween treats with different tastes and looks. You’ll find simple recipes and more complex ones to show off your baking skills. These treats are great for Halloween parties or cozy nights at home, bringing joy to all.
Candy Corn Rice Krispie Treats
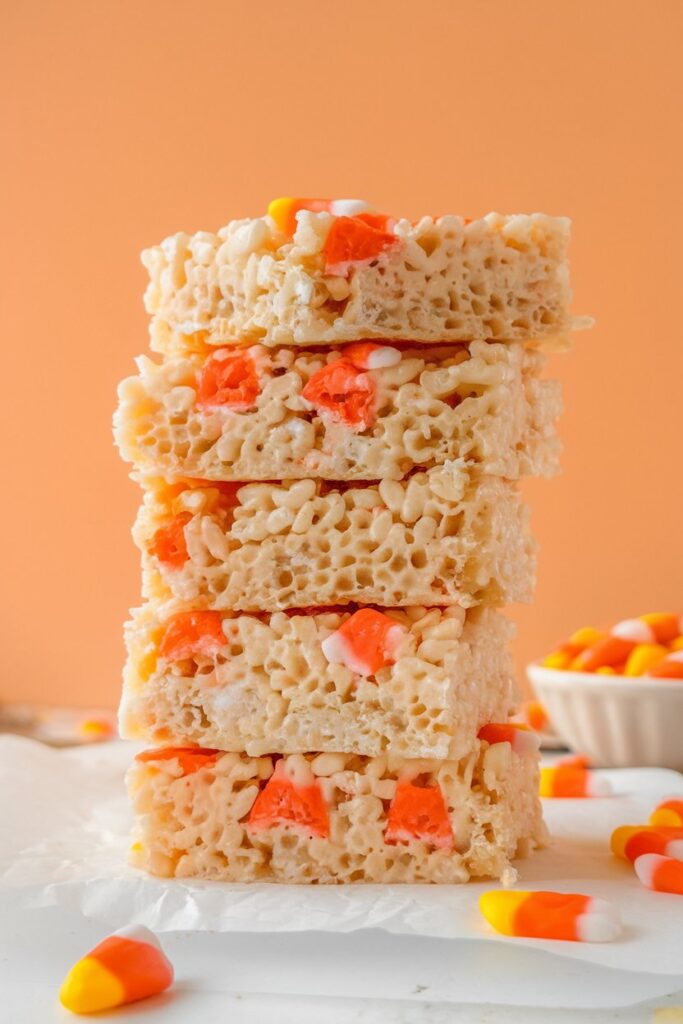
Get into the Halloween spirit with Candy Corn Rice Krispie Treats. This fun recipe combines Rice Krispie treats with colorful candy corn. It’s a delightful treat perfect for Halloween gatherings.
With a prep time of just 10 minutes and an additional 10 minutes for cooking, these treats are easy for kids to make.
- 2 ½ cups mini marshmallows (yellow layer)
- 1 ¾ cups mini marshmallows (orange layer)
- ¾ cup mini marshmallows (white layer)
- 2 ¼ cups crisp rice cereal (yellow layer)
- 1 ¼ cups + 2 tablespoons crisp rice cereal (orange layer)
- ¾ cup crisp rice cereal (white layer)
- 5 drops yellow food gel
- 1-2 drops red food gel
- A pinch of salt
This recipe yields approximately 16 bars, perfect for a crowd. Choose to cut them into fun shapes or serve them as squares for a charming presentation. The combination of marshmallows and candy corn adds a sweet chewiness that captures the essence of Halloween.
The layers are created by preparing each layer separately. Use a clean bowl for the white layer, while reusing the bowl for the yellow and orange layers. It is important to allow these treats to cool for a minimum of 2 hours before slicing into triangles. Each serving contains around 228 calories, with sugar content at 27.3 grams, making these treats an indulgent yet enjoyable option for Halloween festivities.
For those looking to try more Halloween recipes, consider exploring different variations of these treats. Whether you choose to incorporate other colorful candies or sprinkle toppings, the possibilities are endless, making them ideal kid-friendly snacks. Experimenting with ingredients can lead to unique creations, such as adding chocolate chips or even drizzling melted chocolate on top for extra sweetness!
Someone looking for an easy Halloween treat can find inspiration in this Candy Corn Rice Krispie Treats recipe. Bring the family together and enjoy a fun day of baking and decorating these delicious snacks!
Homemade Peanut Butter Cups
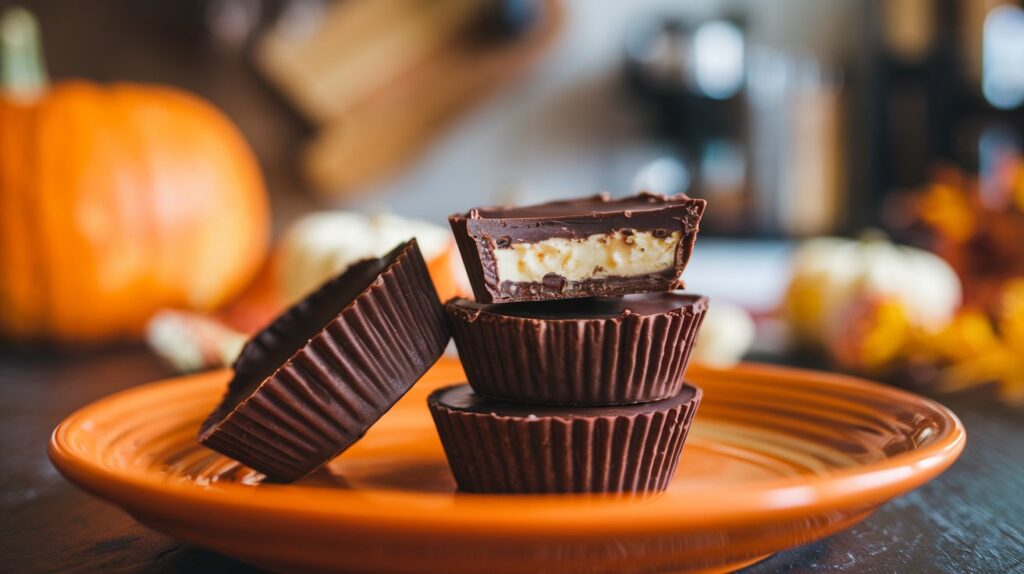
Indulge your sweet tooth this Halloween with homemade peanut butter cups. This treat is richer and creamier than store-bought ones. You can make a delicious batch with just a few simple ingredients.
To make these chocolate treats, you need three main things: creamy peanut butter, white chocolate chips, and confectioners’ sugar. Add a few drops of orange food dye for a festive look. Use black food dye to draw fun ghost faces once the chocolate sets.
Here’s a quick overview of the recipe:
| Ingredient | Amount |
|---|---|
| White chocolate chips | 1 cup |
| Creamy peanut butter | 1/2 cup |
| Confectioners’ sugar | 1/4 cup |
| Orange food dye | As needed |
| Black food dye | As needed |
Melt the white chocolate in a microwave-safe bowl in 30-second intervals. Keep it smooth. Line mini muffin tins with paper liners for easy removal. Pour a layer of melted chocolate, then add a peanut butter and confectioners’ sugar mix before topping with more chocolate. Chill for at least an hour to set properly.
Draw ghost faces on the treats after the chocolate hardens. Use a black food marker or icing for this. This recipe makes 12 delicious homemade peanut butter cups, great for Halloween parties or gifts.
Store these treats in an airtight container at room temperature for up to five days or refrigerate for a month. Try almond butter for a nutty twist or different nut butters for unique flavors. Your Halloween candy spread will be both spooky and sweet!
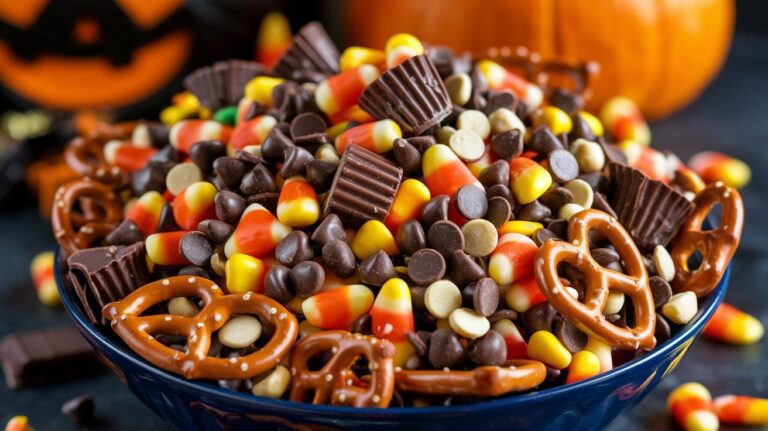
Halloween Snack Mix
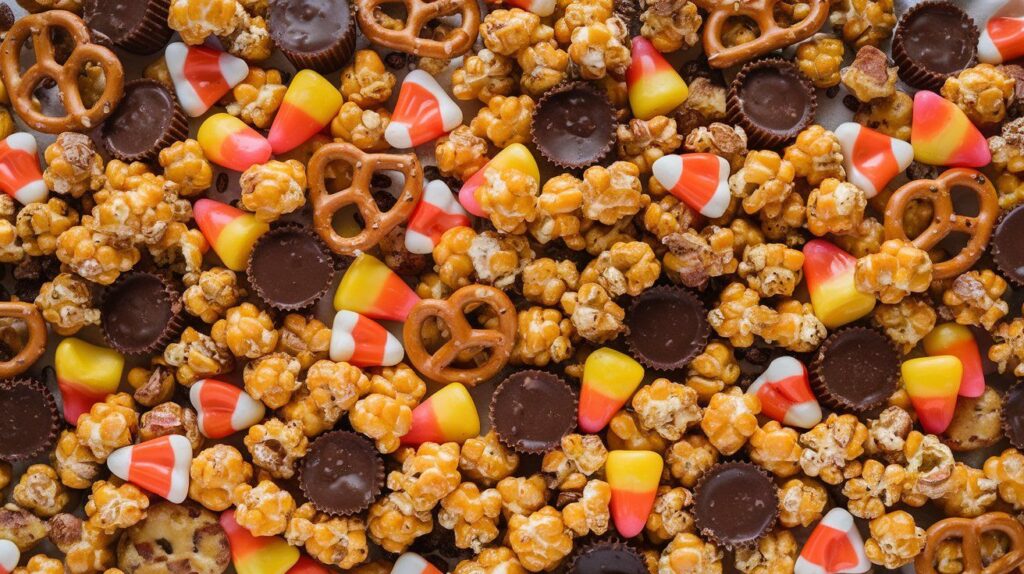
Making a Halloween snack mix is a fun way to enjoy sweet and salty treats. It starts with 8 cups of popped popcorn, 2 cups of Rice Chex cereal, and 1 cup of gluten-free pretzel sticks. These add a crunchy base.
Then, add 1 cup of peanuts, a 12 oz bag of white chocolate chips, and 1 tablespoon of coconut or vegetable oil. This brings a rich flavor. Finally, sprinkle in a cup of Reese’s Pieces and candy corn for a festive touch.
This mix is perfect for parties and satisfies everyone’s cravings. It has about 485 calories per serving, with 78g of carbs and 12g of protein. It’s quick to make, taking just 45 minutes total.
Store it in an airtight container or Ziplock bags to keep it fresh for up to five days.
Customizing this mix is easy. Try adding Skittles, M&M’s, Twix, or Sour Patch Kids. For a spooky twist, add edible eye balls, Halloween-themed sprinkles, or coarse sea salt. With gluten-free options like Rice Chex and gluten-free white chocolate chips, it’s easy to make it safe for everyone.
In short, the Halloween snack mix is a delightful treat that’s easy to make. It’s perfect for parties or family movie nights. You can make it your own, ensuring everyone finds something they love.
Ghost Sugar Cookies

Ghost sugar cookies are a must-have for Halloween baking. Their delightful shapes and customizable designs make them perfect for festive celebrations. This classic recipe yields 24 servings and is an engaging activity for families and friends alike. Get ready to enjoy the process of mixing, baking, and decorating these tasty treats!
To create the ghost sugar cookies, follow this simple recipe:
- Prep Time: 10 minutes
- Total Time: 2 hours
- Servings: 24 cookies
Ingredients for the Cookie Dough:
- 3 cups all-purpose flour
- 1 teaspoon baking powder
- 1/2 teaspoon kosher salt
- 1 cup (2 sticks) butter
- 1 cup granulated sugar
- 1 large egg
- 1 tablespoon milk
- 1 teaspoon pure vanilla extract
Ingredients for the Sugar Cookie Icing:
- 3 cups powdered sugar
- 1/4 cup light corn syrup
- 1/4 cup milk
- 1/4 teaspoon almond (or vanilla) extract
After baking, unleash your creativity with the decorating process. Use icing and colorful sprinkles to turn these cookies into adorable ghosts. The joy of Halloween baking truly comes alive as you personalize these decorated cookies to fit the spooky season.
Store any leftover cookies in an airtight container at room temperature for up to 3-4 days. This ensures that your delectable creations remain fresh. Enjoying a ghost sugar cookie not only makes for a delightful treat but also brings a festive spirit to any gathering!
| Nutritional Information (per cookie) | Amount |
|---|---|
| Calories | 86 kcal |
| Carbohydrates | 16g |
| Protein | 1g |
| Fat | 2g |
| Saturated Fat | 1g |
| Cholesterol | 4mg |
| Sodium | 55mg |
| Potassium | 8mg |
| Sugar | 11g |
| Vitamin A | 11IU |
| Calcium | 4mg |
| Iron | 1mg |
Spooky Spider Cupcakes
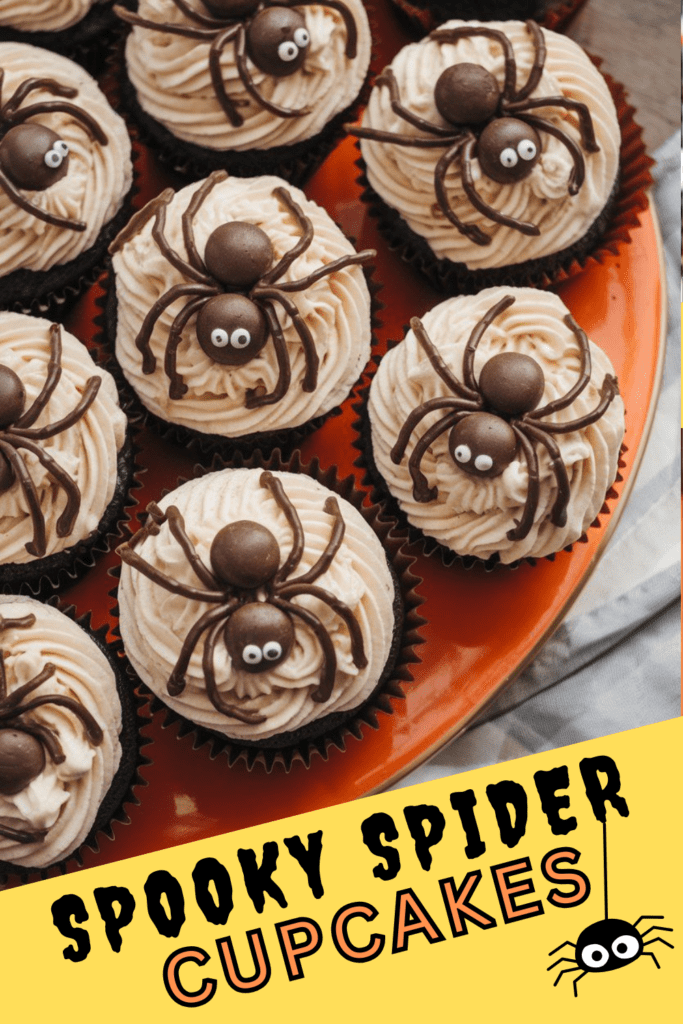
Spooky Spider Cupcakes are a hit at any Halloween party. They can be made with chocolate or vanilla cake, topped with creamy frosting. Decorate them with licorice for spider legs and Oreos for the body for a fun twist.
This recipe has been a favorite for 7 years. It’s great for Halloween. You can make it gluten-free using special flours, so everyone can enjoy it.
- Yield: 18 servings
- Prep time: 10 minutes
- Cooking time: 20 minutes
- Total time: 50 minutes
Homemade candy eyeballs add a spooky touch. They’re made from simple ingredients like powdered sugar. They’re healthier than store-bought ones and look amazing.
| Nutrition Information | Per Serving (1 Cupcake) |
|---|---|
| Calories | 139.5 kcal |
| Carbohydrates | 26g |
| Protein | 1.5g |
| Fat | 3.5g |
| Saturated Fat | 0.5g |
| Sodium | 291mg |
| Fiber | 2g |
| Sugar | 17g |
These cupcakes can be made ahead of time. Unfrosted ones last 4 days, frosted ones 3 days in the fridge. You can freeze them for up to 3 months. Try this recipe and check out this fun Halloween treat for more spooky desserts!
Mummy Brownie Bites
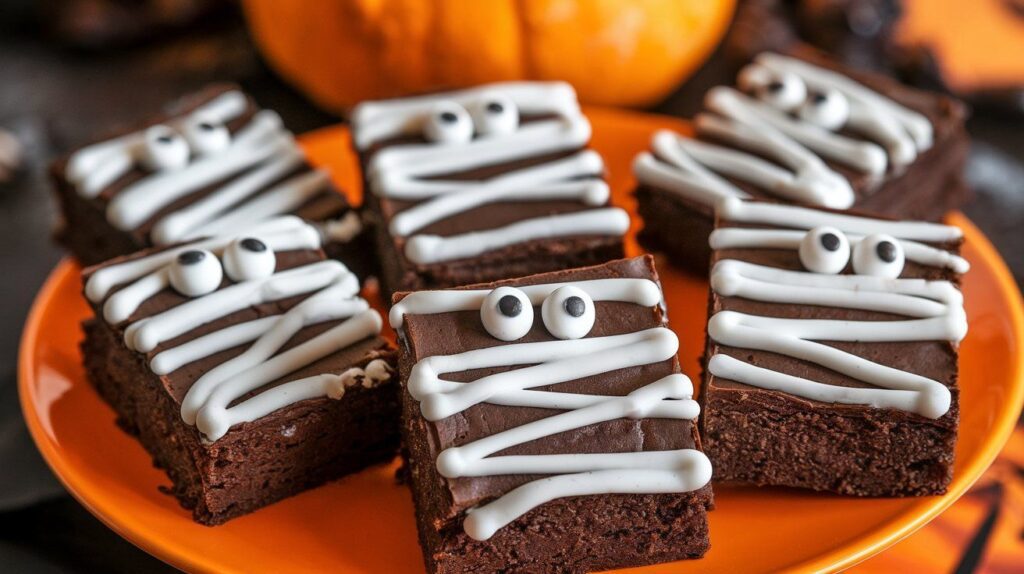
Mummy Brownie Bites are a fun treat for Halloween. They mix fudgy brownies with a mummy design. This makes them a favorite among kids and adults alike. To make these treats, cut fudgy brownies into small squares using a 1.5-inch round biscuit cutter. The icing adds a creative touch.
These Halloween desserts have a rich mix of ingredients. They include 1 ½ cups of melted butter, ¾ cup of cocoa, 3 cups of sugar, 6 beaten eggs, 1 ½ teaspoons of vanilla, ¾ teaspoon of salt, and 2 ¼ cups of flour. After baking, decorate with melted white chocolate and add candy eyeballs for a fun touch.
Each batch makes about 24 bites. You can also cut around nine 1 ½ inch circles from an 8×8 pan. Each brownie has about 352 calories, 46g of carbohydrates, 4g of protein, and 18g of fat. These treats are a hit at parties and disappear fast!
To store, keep the cut Mummy brownies in an airtight container at room temperature for up to 5 days. For longer storage, flash-freeze them individually on a cookie sheet. Then, transfer them to an airtight container with parchment paper between each piece. They can be stored for up to three months in the freezer.
Want to make these magical Mummy brownies? The preparation and icing time is about 1 hour and 20 minutes. This makes it easy to add these chocolate treats to your Halloween celebrations. With an estimated cost of $10, your Halloween festivities will be even more delicious!
Pumpkin Cake Pops
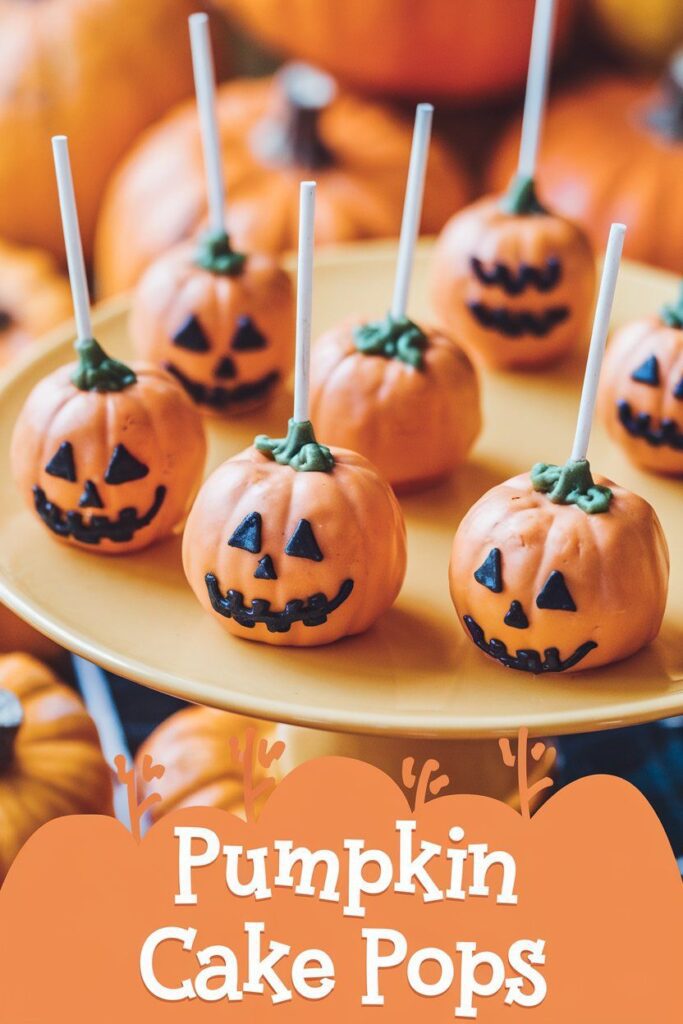
Pumpkin cake pops are a tasty mix of cake and chocolate, great for Halloween. Start by baking a moist pumpkin cake. Then, mix it with cream cheese frosting to make a yummy batter.
To make them even better, dip them in orange candy melts. This makes them look like real pumpkins. Add pretzel pieces for a fun touch. Making these treats is not only delicious but also a fun activity for the whole family.
- First, preheat your oven to 350°F. Mix together unsalted butter, caster sugar, eggs, and plain flour.
- After the cake cools, crumble it and mix it with buttercream. Use a 3:1 ratio of cake to frosting.
- Roll the mix into small balls and put them on parchment paper.
- Dip each ball in melted orange candy melts for a smooth coat.
- Finally, add sprinkles or pretzel pieces for decoration.
Each batch makes about 32 pumpkin cake pops, with 96 calories each. Store un-dipped balls in the freezer for up to 2 months. Once dipped, they last 2 days at room temperature. Try different recipes to find your favorite flavors for any celebration. For more ideas, check out this pumpkin cake bites recipe.
| Ingredient | Quantity |
|---|---|
| Unsalted Butter | 1 cup |
| Powdered Sugar | 1½ cups (180g) |
| Eggs | 3 large |
| Plain Flour | 3 cups |
| Baking Powder | 1 tablespoon |
| Milk | ½ cup |
| Vanilla Extract | 1 teaspoon |
Halloween Cream Cheese Swirl Brownies
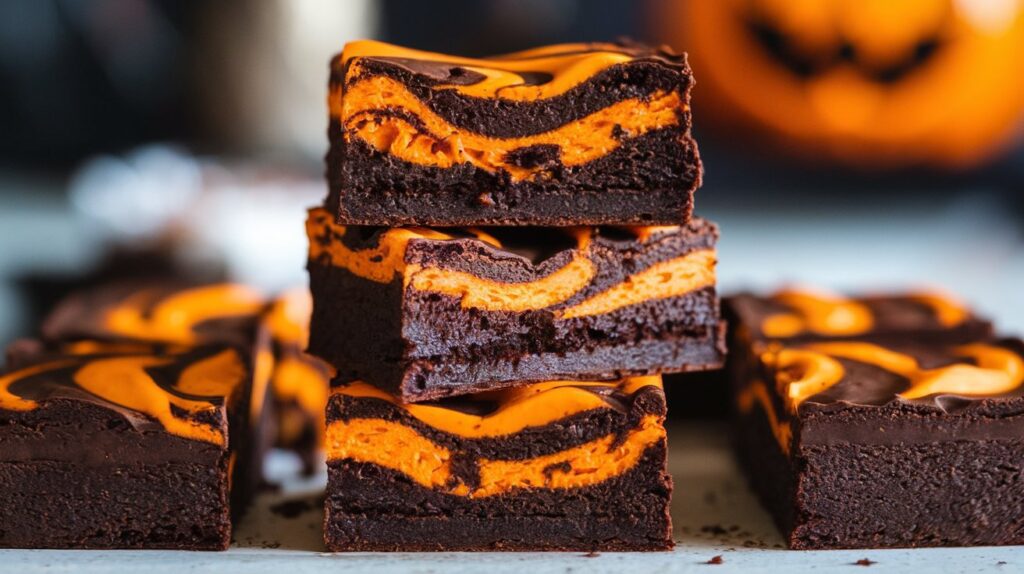
Halloween Cream Cheese Swirl Brownies are a fun twist on regular brownies. They’re perfect for Halloween treats. This recipe turns simple brownies into a creamy delight that will wow everyone.
To make these spooky brownies, use an 8×8 baking pan. The batter includes 4 ounces of semi-sweet chocolate and 3/4 cup of unsweetened cocoa powder. This gives them a deep chocolate taste.
For the cheesecake layer, you need 8 ounces of cream cheese. It adds a tangy creaminess that balances the sweetness. Adding two drops of orange gel food coloring brightens the mix. You can also add chopped nuts, caramel bits, or candy corn for extra fun.
The batter swirls beautifully with the cream cheese layer, making a stunning marbled effect. Bake at 350°F for 25-30 minutes, until the edges are set. These treats make nine servings, each with 357 calories, for a rich treat.
When storing these brownies, use an airtight container in the fridge for up to a week. Or freeze them individually for later. They can be frozen for up to three months. For bigger groups, double the recipe for a 9×13 pan.
These brownies have a 4.64-star rating from 276 reviews, showing they’re a hit. For more Halloween fun, try making homemade peanut butter cups for a fun Halloween celebration.
| Ingredient | Amount |
|---|---|
| Semi-sweet chocolate bar | 4 oz |
| Unsweetened cocoa powder | 3/4 cup |
| Cream cheese | 8 oz |
| Orange gel food coloring | 1-2 drops |
| Chopped nuts (optional) | As desired |
| Caramel bits (optional) | As desired |
| Candy corn (optional) | As desired |
Rice Krispie Brains
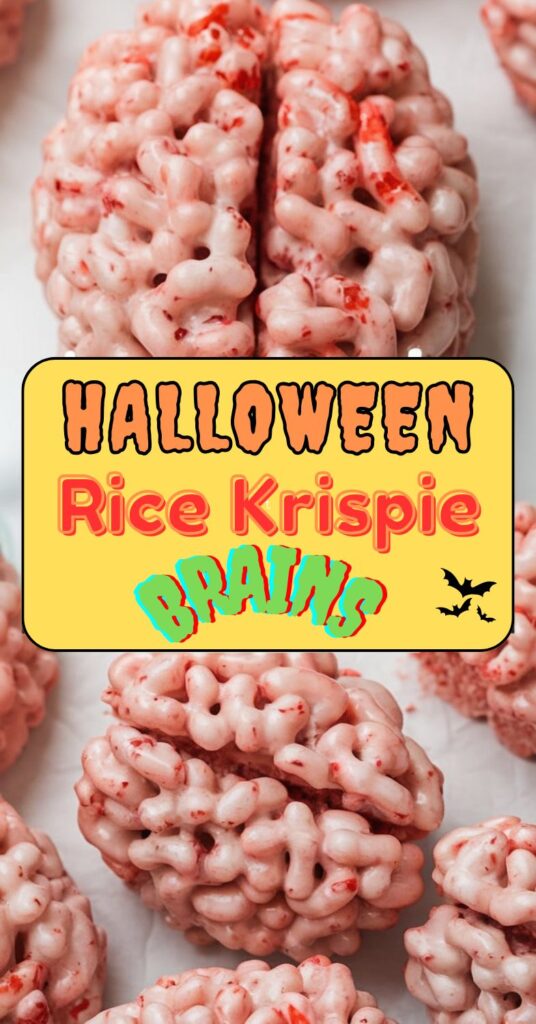
Get ready for a creative twist on classic treats with Rice Krispie brains. This fun recipe turns the traditional Rice Krispie treat into spooky snacks that look like brains. They’re perfect for Halloween gatherings. Shaping and coloring these treats is a fun activity for kids and adults.
To make Rice Krispie brains, you will need the following ingredients:
- 4 tablespoons of butter
- 2 cups of pink and white marshmallows
- ¼ teaspoon of salt
- 4 cups of Rice Krispies
Start by melting the butter and marshmallows in a way that prevents scorching. Use a bowl over a pan of boiling water. Add about 8 drops of red food coloring for a spooky brain-like color. You can shape the mixture into brain shapes using an ice cream scoop or a ¼ cup measure.
After shaping, add optional details like fake “blood” streaks. Use a paintbrush with red food coloring for a macabre touch. These treats will impress at Halloween parties and can be customized to your liking. The recipe makes about 12 to 16 Rice Krispie brains, depending on size.
Enjoying these Rice Krispie brains as Halloween treats is not just about flavor. Each serving has about 87 calories. They’re a delightful, fun snack that’s easy to make in under 30 minutes. For a spooky snack mix, check out the one here.
Store the Rice Krispie brains in an airtight container for up to three days. This keeps them fresh and adds to your Halloween fun. Making these spooky snacks together ensures a memorable Halloween experience.
Spooky Jello Worms
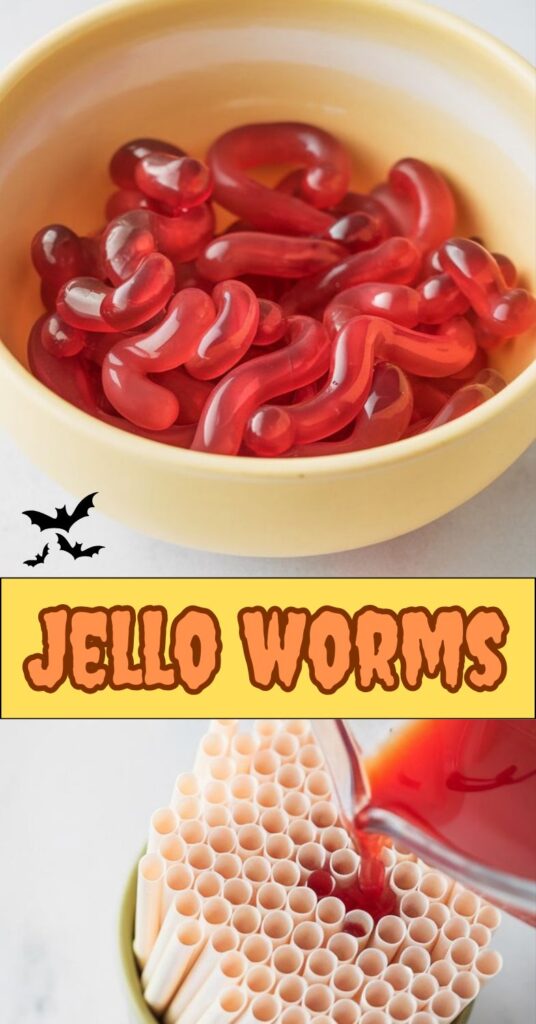
Spooky Jello worms add excitement to any Halloween party. They are easy to make and fun for kids. To make them, mix 6 oz of raspberry Jell-O with 3 cups of boiling water. Then, add 3 envelopes of unflavored gelatin.
Let the mix cool for about 20 minutes until it’s lukewarm. Next, fill 125 flexible straws with the Jell-O mix. Place them in a wide-mouth Mason jar or a cylindrical glass vase to chill in the fridge for at least 8 hours.
Adding gummy worms makes these treats even more fun. Each serving has about 108 calories, 25g of carbs, and 24g of sugar. Top them with whipped cream and sprinkles for extra fun.
Leftover Jello cups can be stored in the fridge for up to a week. But, freezing is not a good idea as it changes the texture. You can make these worms ahead of time for easier planning. Try different flavors like orange or grape for a colorful spread. Check out Candy Corn Rice Krispie Treats for more Halloween treats!
Halloween Oreo Balls

Get ready to impress your guests with Halloween Oreo Balls, the ultimate no-bake treat for festive celebrations. This easy recipe combines crushed Oreos with softened cream cheese to create a creamy and delightful center. With just four simple ingredients—Oreos, cream cheese, dark chocolate melting wafers, and white vanilla melting wafers—these treats are perfect for busy bakers. The process begins by mixing the Oreos and cream cheese into a dough, rolling them into bite-sized balls, and then chilling them for the perfect texture.
Once the balls are set, it’s time for the fun part: coating them in melted chocolate. Heat the chocolate in the microwave for 30 seconds at a time, stirring after each interval, to achieve a smooth melting consistency. Ghirardelli Dark Melting Wafers and Ghirardelli White Vanilla Melting Wafers are ideal due to their ability to harden perfectly without becoming soft at room temperature. Avoid using regular white chocolate chips as they may yield unsatisfactory results.
To create a spooky appearance, decorate the Oreo balls using Halloween-colored sprinkles and candy eyes, available at local grocery stores or online retailers. Chill the decorated balls for an additional 15-20 minutes in the refrigerator to make them even more appealing. This no-bake treat not only looks good but also packs a satisfying taste, perfect for trick-or-treating or Halloween parties.
Properly stored in the refrigerator, these Oreo balls can last up to five days. With approximately 214 calories, 26g of carbohydrates, 2g of protein, and 12g of fat per ball, they can satisfy any sweet tooth during this spooky season. This innovative dessert offers versatility, allowing you to customize flavors and add personal touches. Find the complete recipe for Halloween Oreo Balls here for more creative ideas on crafting these delightful Halloween desserts.
| Ingredient | Amount |
|---|---|
| Oreos | 36 |
| Cream Cheese (softened) | 8 oz |
| Dark Chocolate Melting Wafers | 10 oz |
| White Vanilla Melting Wafers | 10 oz |
| Halloween Colored Sprinkles | as desired |
| Candy Eyes | as desired |
Ghost S’mores Dip
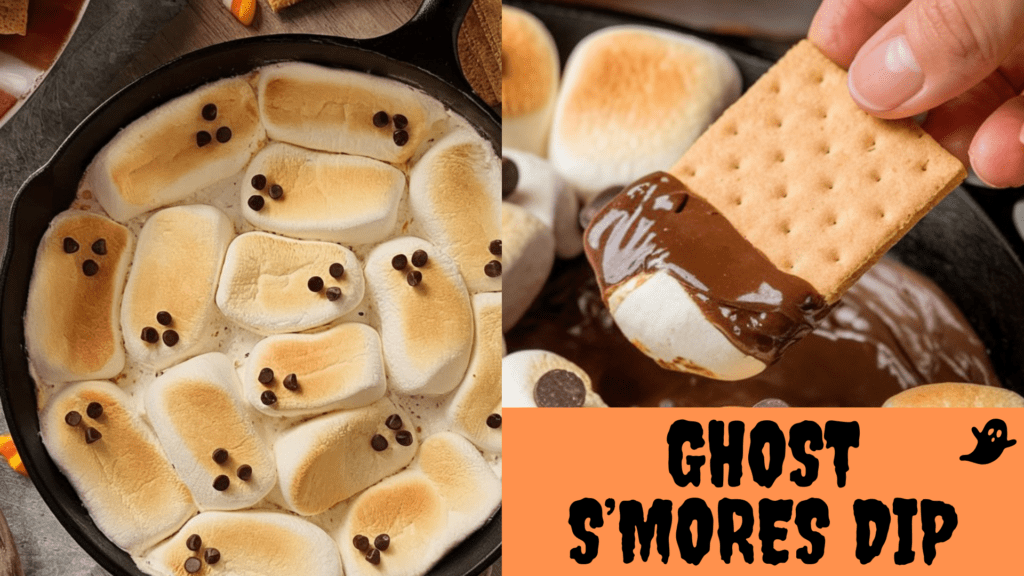
Ghost s’mores dip is a fun twist on traditional s’mores, perfect for Halloween. It’s easy to make and great for parties. Guests can dip graham crackers into a warm mix of chocolate and marshmallows. With just marshmallows, chocolate chips, and heavy cream, it’s a hit.
To make it, spread chocolate chips at the bottom of a baking dish. Pour warm heavy cream over them. For a spooky look, use marshmallow ghosts or large marshmallows. Adjust baking times for different textures.
Serve the dip warm from the oven. Use broken graham crackers for dipping. Add other snacks like sliced apples or Oreos for fun. A platter with these options adds to the festive vibe.
Customize your dip with unique flavors or toppings. This recipe is a starting point for creativity. Enjoy it with pumpkin spice lattes for a special treat this Halloween!
| Ingredient | Purpose |
|---|---|
| Marshmallows | Main topping and spooky decoration |
| Semi-sweet chocolate chips | Base layer for rich flavor |
| Heavy cream | Makes dip creamy and melts chocolate |
| Graham crackers | Primary dipping vehicle |
| Sliced apples | Healthy dipping option |
| Various cookies (Oreos, shortbread, etc.) | Additional fun party snacks |
Witch Finger Pretzel Sticks
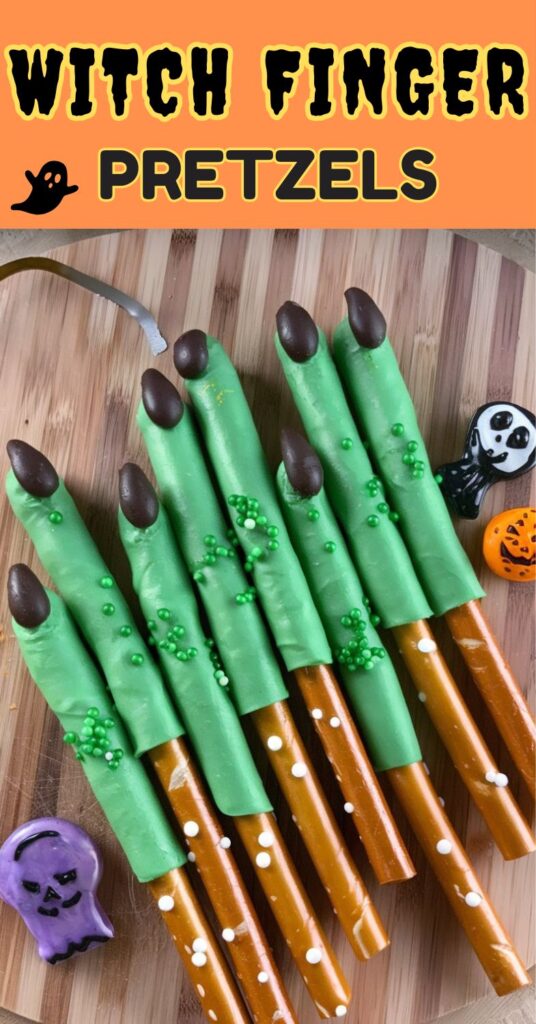
Witch finger pretzels are a fun Halloween snack. They mix pretzel rods’ crunch with candy coating’s sweetness. Start with 14 large pretzel rods and coat them in 12 ounces of bright-green candy melts.
Blanched almonds make great “nails” for each pretzel finger. They add a finishing touch and make the pretzels look festive.
Making these pretzels is a fun way to get creative in the kitchen. Kids and adults alike can enjoy making them. Use a toothpick to add knuckle wrinkles for a spooky look.
Refrigerate the pretzels for 10 minutes to set the coating. This makes them perfect for snacking.
These pretzels are great for parties and gatherings. They offer a playful twist that guests will love. Store them in an airtight container at room temperature for up to a month.
With 122 ratings, it’s clear these snacks are a hit. They’re a favorite during the haunting season.